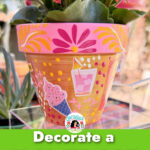
Here are some awesome sticker ideas: Use them to decorate flower pots. These turned out sooo fabulous, I’m super excited to share the process with you!

Sticker ideas: Use them to decorate flower pots
If you’re like me, and you love to craft and collect supplies, you likely have an abundance of stickers of all kinds.
Not just to stick on our water bottles, but also the kind that we use in planners and paper crafting. I have a huge box of these and I love all of them. So I’m trying to come up with ways to use them in every day life so I can actually see them!

This was such a fun project and totally lived up to the image I had in my head. The idea is to take basic terra-cotta flower pots and then use planner stickers or any kind of smaller stickers to decorate the flower pot and then combine it with painted accents. In this tutorial, I will show you the proper method to do it so everything is sealed down and you can actually use the flower pot to plant succulents or whatever you want! OK, let’s get into it!
Supplies:
Terra cotta flower pot
Small-to-medium sized sticker (doesn’t matter if they are matte or gloss)
White craft glue
Brush-on sealer (I LOVED this shimmery one)
Craft paints or acrylic markers
Directions:
It’s not as easy as slapping the stickers on the flower pot, we want to do this right so there is a little bit of a process. I promise it is not difficult at all!
Prep the flower pot
Start with your flower pot and wipe off any dust or debris.
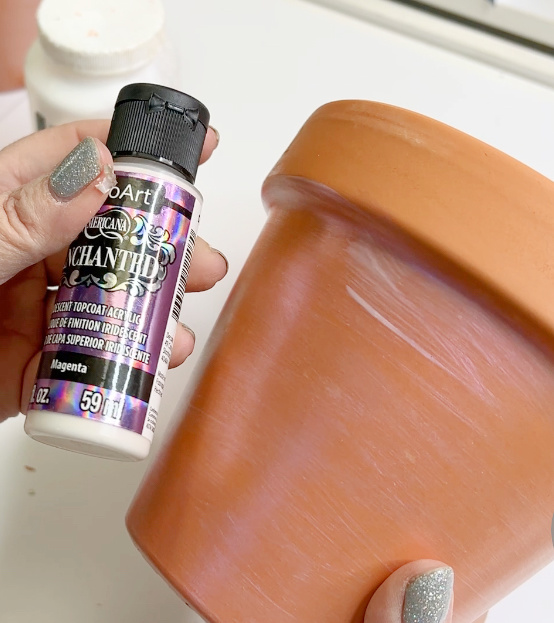
Using a soft wide brush, add two coats of a water-based sealer (matte or gloss will work). I suggest using a shimmer sealer, it adds more dimension to the finished look! Let dry.
Choose your stickers
Set out your stickers and choose which ones you would like to put on your flower pot. Look at the shape and the design so that you get a good variety. You can also incorporate word stickers or ones that have phrases.
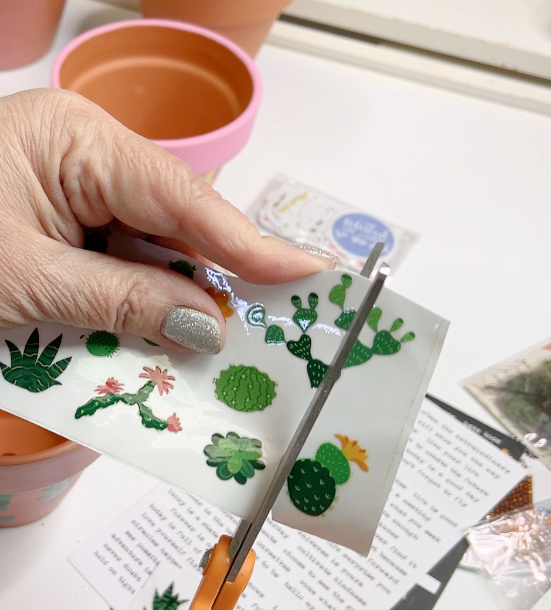
Decide if you only want to put a few stickers or cover the whole thing.
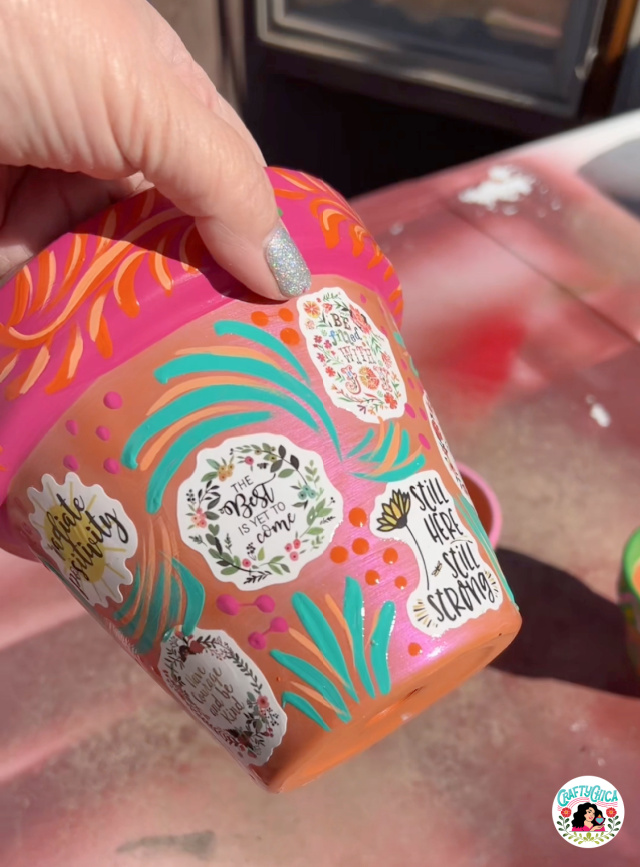
Add the stickers
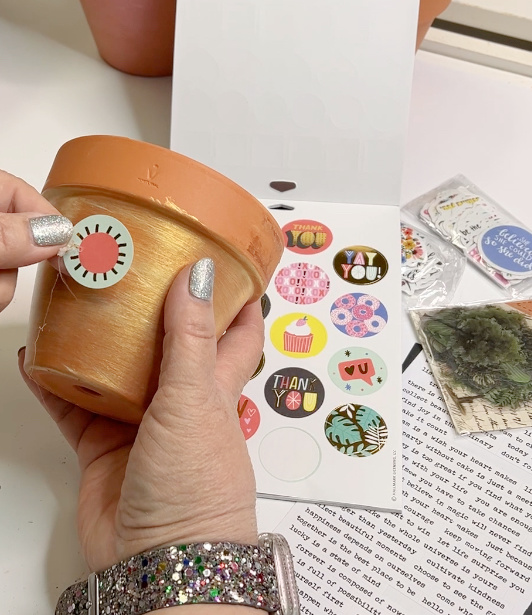
Place your stickers on the flower pot and rub your finger over them to make sure that they are pressed down around all the edges. Make sure there are no gaps at all between the sticker and the flower pot.
If your stickers are not adhering well, use some white craft glue to secure.
Seal the stickers

Once all your stickers are in place, you will need to permanently seal them to make them waterproof. Put white craft glue on your finger and smooth it all around the stickers’ edges, as well as over the top of each sticker. Just a thin layer will do. You just want to go a little bit over the edge. Let dry until the glue is clear.
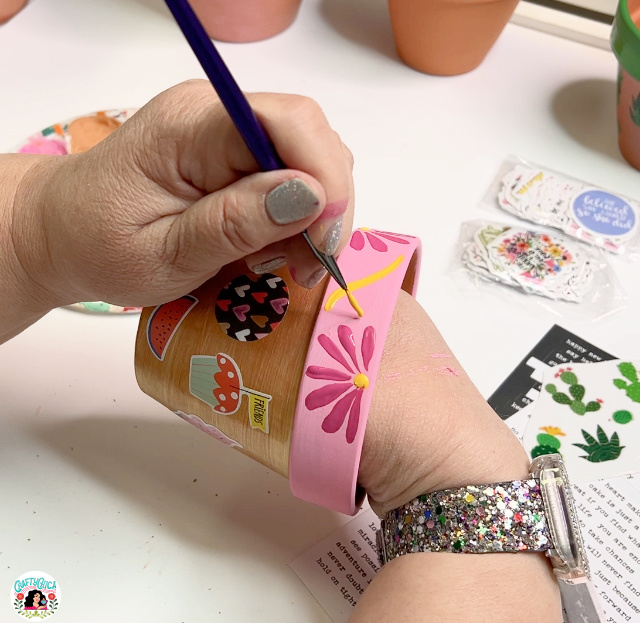
Add painted accents
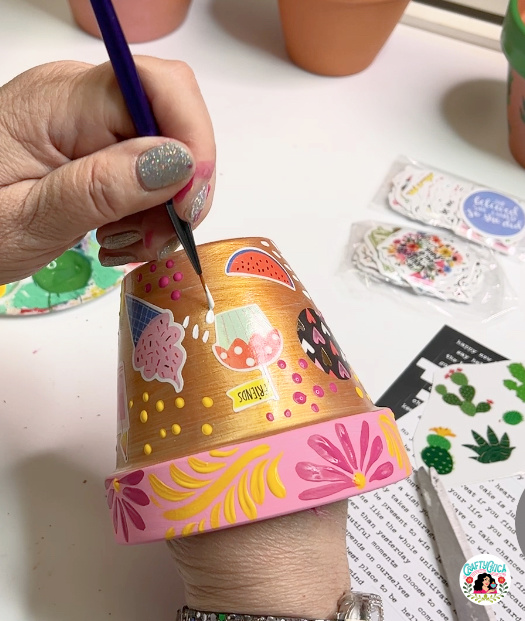
Now it’s time to fill in the negative space with color and designs! Use a liner paintbrush or you can use paint markers. Create a variety of patterns to make it more interesting or you could add repetitive types of flowers or leaves.
Paint and decorate the rim of the flower pot to your liking.
Varnish
Once all the paint is dry, take it outside and add a coat of glossy spray varnish. You can also use a brush on varnish if you prefer.
RELATED:
Crafty Chica sticker shop + 25 creative uses for stickers
Sticker Journaling – A relaxing sticker craft idea
Other sticker ideas to decorate flower pots:
- Centerpieces for a part.y
- Housewarming gift with a plant inside.
- Pen or pencil caddy for your desk, make sure to use motivational stickers to give you a little pep throughout your day!
- Gift baskets.
- Print family photos on laser, color prints, and make a flower pot for each family member. You can also print off quotes or things from their social media accounts to give them more personality.
- Make a jumbo version for your patio, they look nice when they are together in a little collection.
What ideas do you have for this?
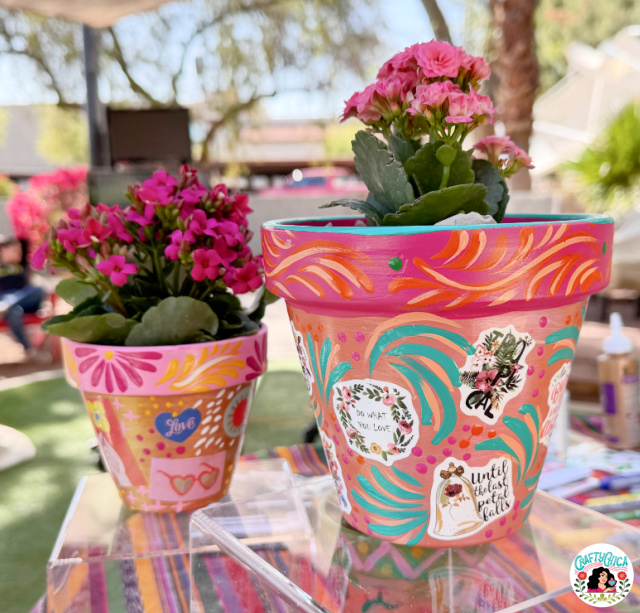
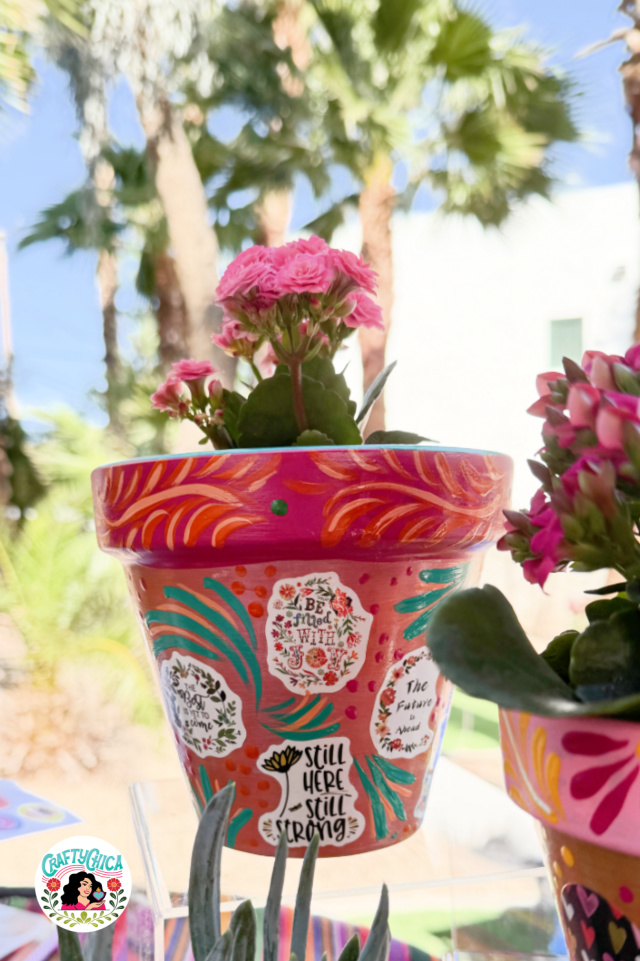
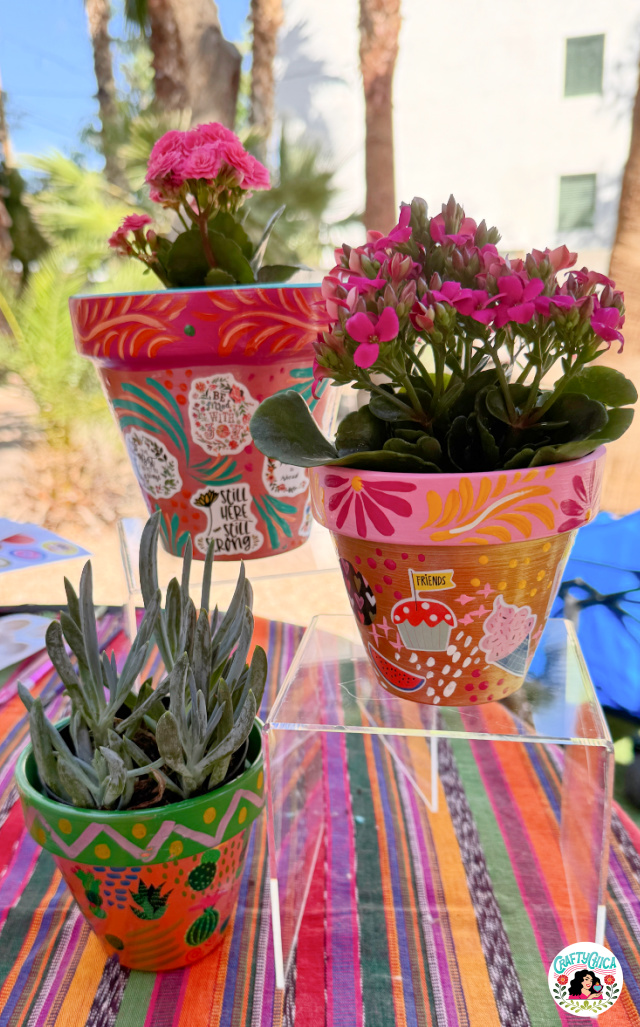
Here are more pictures!
RELATED:
Cricut Joy Projects: DIY Flower Pots!
DIY Millennial Loteria Flower Pots
Barro Rojo DIYS: Terracotta pots decorating ideas + Terracotta crafts